Unity Character Creator Tutorial
12 Jul 2019
There are a multiple different ways you can go about implementing a character creator system in Unity. In this tutorial, I will be showing you the easiest way but not the most efficient in terms of rendering performance.
This method doesn’t combine meshes and materials. It simply attaches meshes to different bones.
If you don’t know anything about skinned meshes in Unity then I recommending reading through the information. If you are experience with skinned meshes then you can skip to the script.
Hierarchy
For the character creator, we want to be able to attach multiple different meshes to the same bones so they all move together.
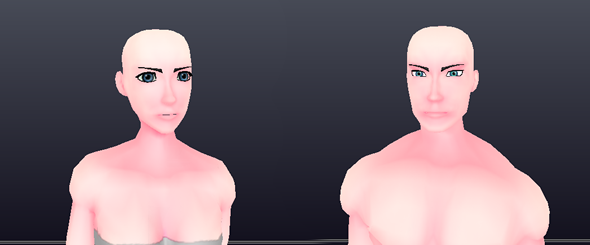
So let’s start by looking at how skinned meshes work in Unity to understand how we can combine them. Start by dragging a skinned mesh into the game scene so we can take a look at what it’s comprised of.
So in the hierarchy you can see the main parent object. The parent object has an animator component attached to it. The animator component is in charge of applying animations to the bones.
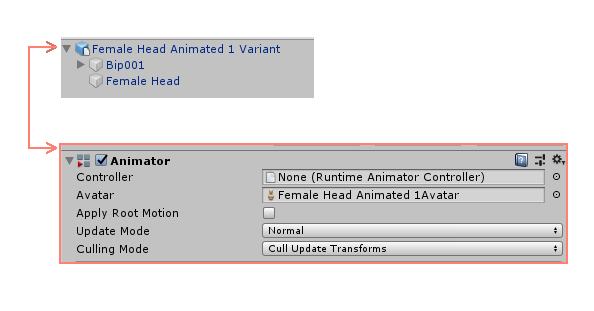
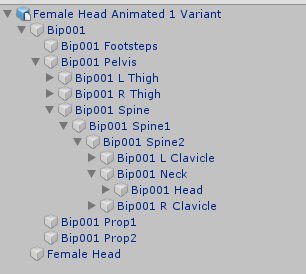
If we look at the first child object we can see the bones of the mesh. These are the bones that the animator component animates. If you expand the bone hierarchy, you can see all of the bones and how they are connected.
The second child object contains the a skinned mesh renderer component. This component is incharge of rendering the mesh. It also makes sure the mesh bends according to the bones.
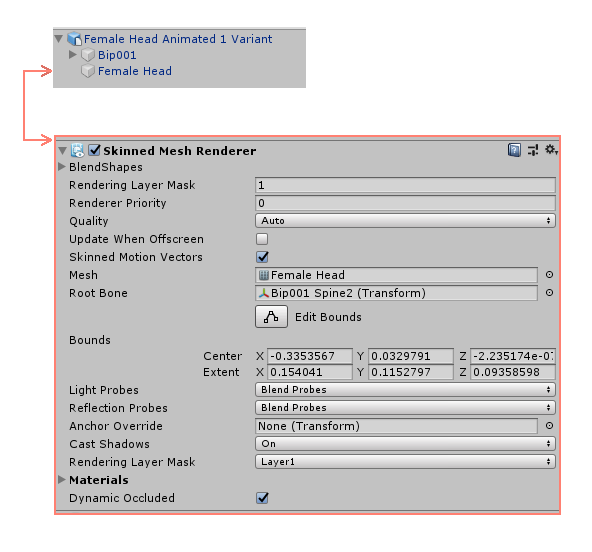
Skinned Mesh Renderer
Now that we understand a bit about the hierarchy of a skinned mesh, we can now take a closer look at the skinned mesh renderer component.
When we look at the documentation of the Skinned Mesh Renderer, we can see that it has a property called “bones” and another property called “sharedMesh”. These are the 2 properties we will need to understand.
Bones
The bones property is an array of Transforms. The array contains the transforms of all the bones that are used by the skinned mesh renderer. The order of the bones is important because the Mesh uses the bone indices for the vertex weights.
Shared Mesh
The sharedMesh property returns the Mesh of the Skinned Mesh Renderer. The mesh itself has a property named boneWeights. The boneWeights is an array of BoneWeight that corresponds to each of the vertices in the mesh.
BoneWeight contains the data for the vertex weights. Each vertex can be affected by up to 4 bones. BoneWeight uses the bone index from the bones array that I mentioned previously.
We can use this information to attach the mesh to a different bone structure. Since the bones are referenced by their index, all we need to do is change the bones in the array. The boneWeights will then use the new bones. It’s important that the new bones are in the same order as the old bones for this to work.
Creating The Meshes
To get all of this to work, we will need to rig the meshes correctly. To do this I will be using 3ds Max but you can use other software like Blender.
All of the meshes will need to be rigged using the same skeleton. It’s also important that the meshes are skinned identically. This will make it so the meshes line up correctly.
To do this in 3ds Max, all you have to do is skin your character using envelopes. Once you have done that, you can copy and past the skin modifier onto other meshes.
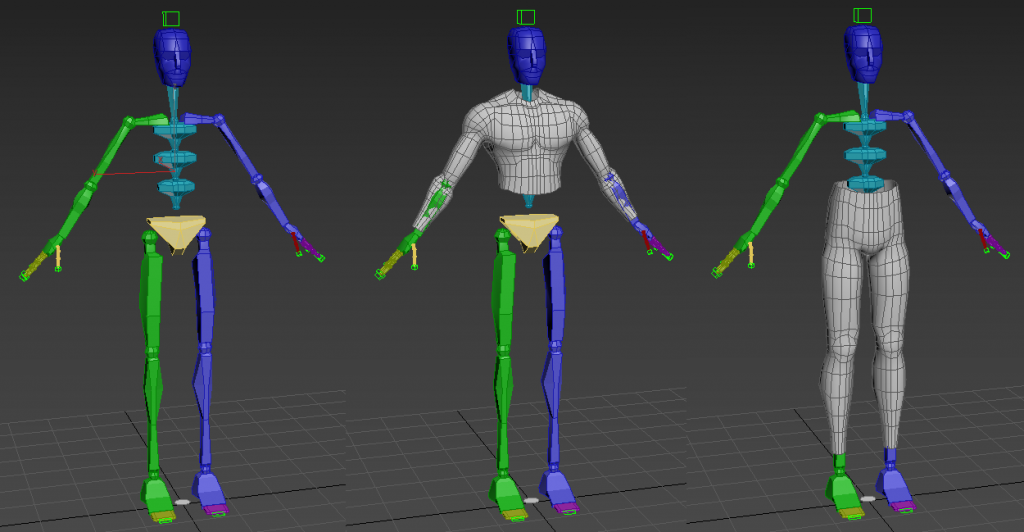
The meshes can then be exported individually as an FBX file. You will need to make sure that both the bones and mesh are exported in the file. The bones will also need to be exported in their own file since that will be used as a frame for the character creator.
Script
Here is a script that will give you a basic idea of how it works. To use the script you will need to create a frame for the meshes to be attached to. This frame can just be made by exporting the bones from your software. Add the frame to the scene and then attach the script to the parent object.
The script is commented so you can get an understanding of what each part does.
public class BodyBuilder : MonoBehaviour
{
    //This is the parent bone that will be used to get all of the bones
    public GameObject RootBone;

    //This is an array that holds all the bones.
    private Transform[] Bones;

    //All of the skinned mesh objects that you want to combine.
    public List<GameObject> Parts;


    // Start is called before the first frame update
    void Start()
    {
        //This gets and stores all the bones by using the root bone.
        Bones = RootBone.GetComponentsInChildren<Transform>();

        //This adds all the parts in the Parts array.
        foreach (GameObject part in Parts)
        {
            AddPart(part);
        }
    }

    //This takes a skinned mesh object and adds it to the bones of your character.
    public void AddPart(GameObject part)
    {
        //All of the bones that the mesh uses will be stored in this array.
        Transform[] partBones;

        //The new bones will be added to this array.
        Transform[] newPartBones;

        //We clone the object so we don't alter the original object.
        GameObject clonedPart = Instantiate(part, this.transform);

        //We get the skinned mesh renderer from the object.
        SkinnedMeshRenderer partRenderer = clonedPart.GetComponentInChildren<SkinnedMeshRenderer>(true);

        //This stores the bones that are used by the mesh
        partBones = partRenderer.bones;

        newPartBones = new Transform[partBones.Length];

        //This loop builds the new array of bones.
        for (int i = 0; i < partBones.Length; i++)
        {
            for (int k = 0; k < Bones.Length; k++)
            {
                //compares the name of the bones to find a match
                bool bonesMatch = partBones[i].name == Bones[k].name;
                if (bonesMatch)
                {
                    newPartBones[i] = Bones[k];

                    //once we have found a match, we don't need to keep searching the rest of the bones.
                    k = Bones.Length;
                }
            }
        }

        //Sets the new bones to be used by the SkinnedMeshRenderer
        partRenderer.bones = newPartBones;

        //Creates a clone of the mesh since we don't need the old bones anymore
        GameObject skin = Instantiate(partRenderer.gameObject, this.transform);

        //Removes the objects from the scene since we don't need them
        Destroy(clonedPart);
    }
}
Now we will need to add some game objects to the script. For the Root Bone, we will need to add the parent bone of our frame. This bone will be used to get all the other bones.
The Parts property of the script is used to store all the meshes that we want to combine together to create the character. This can be body parts and clothes. You can add any number of parts to the script.
When you run the script it will attach all off the separate meshes to the main bone structure. The script is basic but you can extend the script to swap parts or change the colour of the meshes.
Pros & Cons
Pros
This method is extremely quick since we aren’t actually combining meshes and textures together. So you can swap clothes or body parts with almost no lag.
Each mesh has its own material so you can easily change the colour of each mesh without any fuss.
Each mesh retains their blend shapes so you can still use facial animations.
Cons
Since we aren’t combining the meshes and materials together, each mesh will have its own draw call. This will cause performance impacts when rendering. This method isn’t recommended if you want large numbers of characters on the screen.
This method can be used in certain situations without much performance impact but this will vary depending on the device; the number of characters; and the complexity of shaders.