UVW Mapping
17 Apr 2019
This post goes over some techniques that I have found really useful for UVW mapping characters in 3ds Max. These techniques should give you a nice uniform wrap of your model.
Seams
Seams can become noticeable when using low resolution textures. For this reason, it’s a good idea to put them in places you don’t see very often.
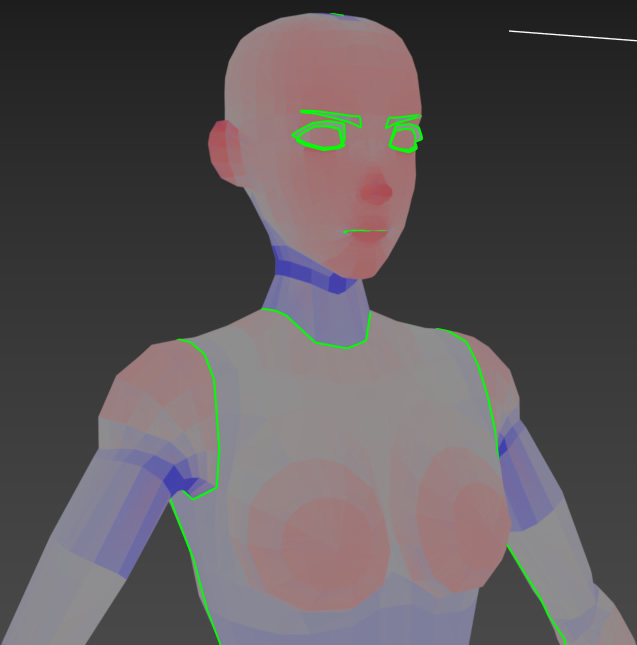
For parts like the head, it’s possible to unwrap it in one piece with a seam that runs up the back of the head. The seam on the back of the head will most likely be covered up with hair anyway.
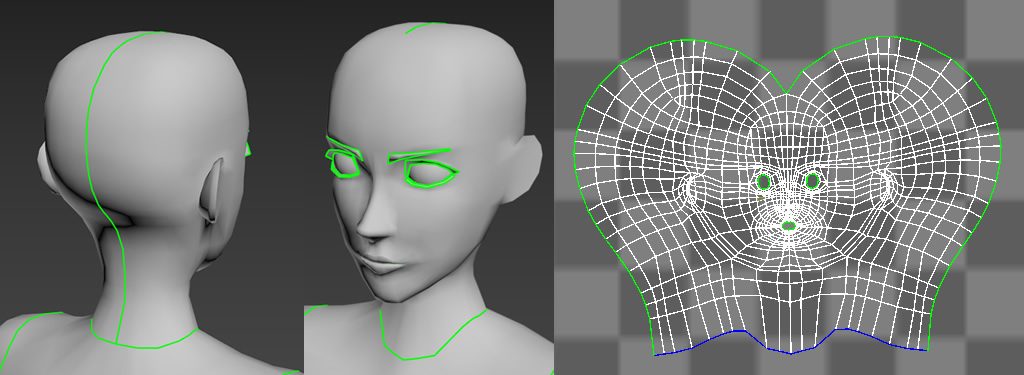
For the torso, I normally put the seams on the sides and under the groin. The sides will be obscured by the arms most of the time and you will rarely ever seen under the groin. This allows the torso to be unwrapped in a single piece with no seams on top of the shoulders.
If your character is going to be in a side scrolling game, you might want to put the seam on the back of the character since the sides are going to be visible most of the time.
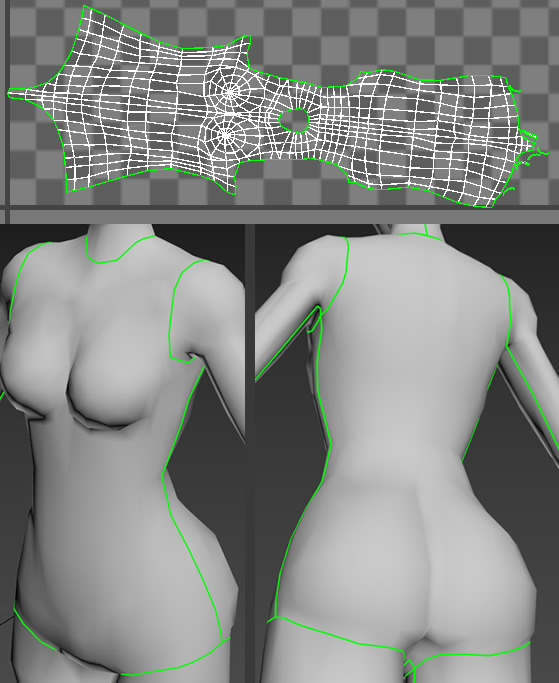
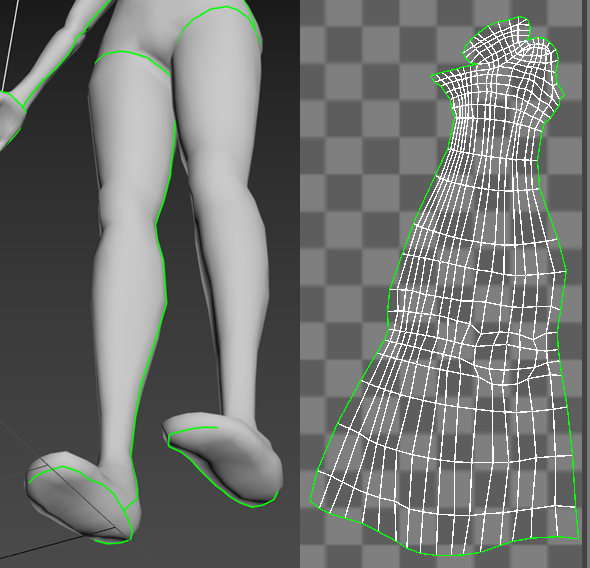
With the arms, I put a seam on the side close to the body since it’s hard to see. The arm is also connected to the back of the hand. I put seams along the edge of the hand so the palm is a seperate piece.

This serves 2 purposes. It won’t have a seam on the back of the wrist where the arm and hand connect. It also keeps the seems hidden between the fingers. So if you are going to do a close up of the palm, you won’t see seams running across it.
The legs are done in a similar way to the arms but I leave the sole of the foot attached to the leg. This way it comes off in a single piece.
Angle & Area Distortion
Angle and area distortion are good tools for debugging the UWV map.
Angle Distortion
Angle distortion indicates where there will be a lot of stretching of the texture. When you select angle distortion in the UV editor, it will apply red and blue shading to the texture. The red and blue colours indicate high levels of distortion, when it’s grey there is less distortion. You want to keep the angle distortion as low as possible.

To do this, I use the quick peel tool. I find the the peel tool is designed to keep angle distortion low when you unwrap the model. In peel mode you can set pins that anchor the mesh to certain points and the mesh will warp to keep the angle distortion low when you move points around.
Area Distortion
Area distortion indicates where there is more or less pixel density. This seems to be relative to other polygons, So if you scale an cluster in the UV editor, you won’t see a change in distortion. If you change the shape of a single polygon you will see the colours change since its size is changing relative to the size of other polygons in the cluster.
Area distortion is a lot harder to avoid. Using peel mode won’t automatically adjust area distortion like it does with angle distortion. For the most part you don’t need to worry about area distortion too much. It’s better to focus on angle distortion to avoid pixel stretching.
Flipped & Overlapping UVs
To make sure there are no flipped or overlapping faces, you should use the xview to highlight problem area.
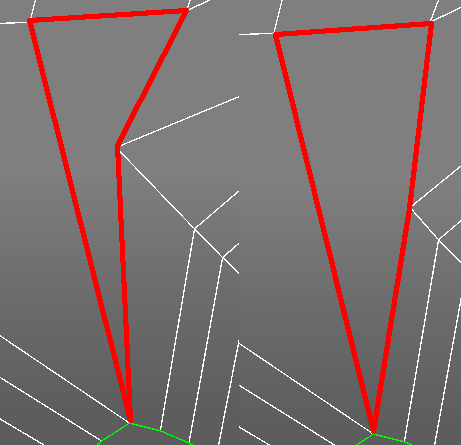
Sometimes the faces will get flipped when peeling the model. This occurs when a quad face has a concave outline. Since the quad is made up of two triangles, one of the triangles will get flipped. All you have to do is make sure the quad has a convex outline.
Overlapping faces can also occur when peeling parts of the model. You will need to enter peel mode to adjust the shape using the pins. Sometimes it might be too difficult to adjust the shape. When this happens you should rethink where you put the seams.
Packing
It’s important to make the most efficient use of space when positioning the elements in the UV editor. This will ensure that you are making the most use of the texture when it’s applied to the model.
The UV editor has some tools that make this easy for you. In the sidebar of the UV editor you will see a section labeled “arrange elements”. I’ve found the custom packing to work the best.
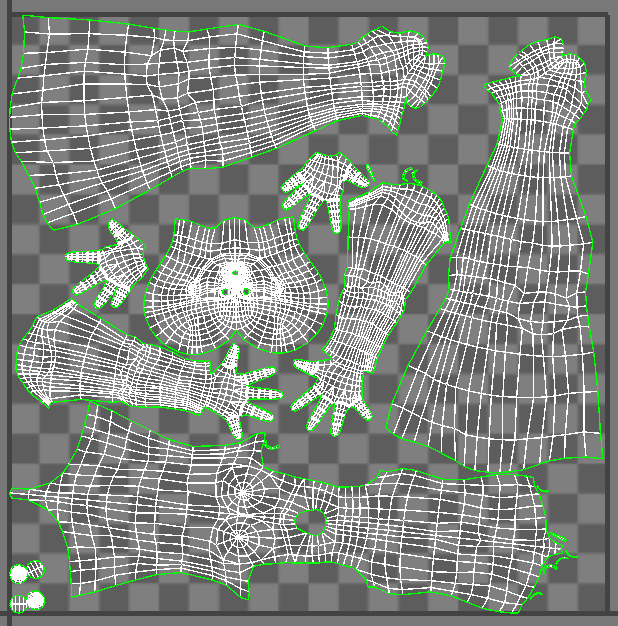
If you click and hold the “custom” button and open the dialogue box, it will take you to the settings. The settings I like to use are non-convex, padding set to 0.001 and all of the others optioned turned on. This will let the editor figure out the best way to rotate and scale the clusters.
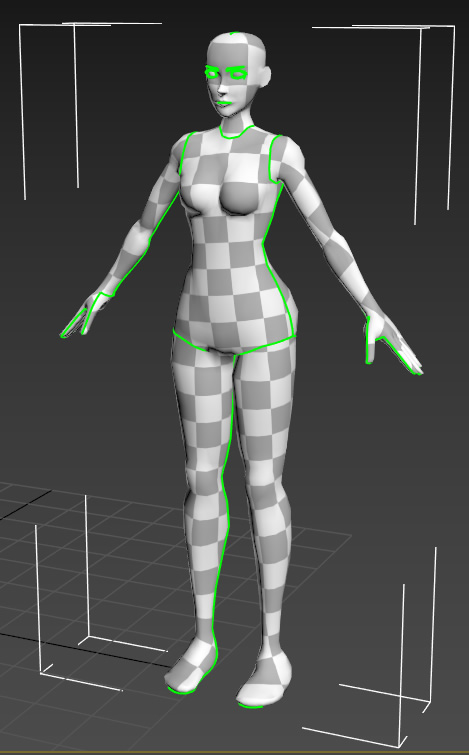
The packing tools will keep the resolution density even across the model. So the squares in the checker pattern should remain roughly the same size across the surface of the model. It’s a lot harder achieve this when manually scaling the clusters.